Kitchen Renovation: What I Wish I Knew Before We Started

If you follow me on Instagram, it’s no secret that my husband and I lived through a major kitchen renovation in 2022. After over two years of being in our home and working in our kitchen, we were itching to build something that would work best for the both of us – him as a chef and fermentation enthusiast, and me as a baker and aspiring backyard homesteader. Our original kitchen setup was set up was not conducive to any of that, and made both working and entertaining in the space really challenging and unpleasant.
Now? Well the kitchen is finally done! Granted, the path there was not perfect, but overall we were very fortunate to have no major surprises like mold or structural damage. Now that I’ve been through a full renovation, I figured I’d share my lessons learned and things to consider if you ever decide to dip your toe into the pool of kitchen renovation.
When it comes to contractor selection for your kitchen renovation, trust your gut
This seems like a no brainer, but it’s worth being said. We actually were hoping to start our kitchen renovation a lot sooner than we did, but we struggled with locking down a contractor. The first duo we referred to us moved across the country, and the next ones we found to be incredibly slow to respond and took forever to get us a ballpark quote. A good contractor provides a written estimate/statement of work so it’s very clear what to expect before demolition begins.
At the end of the day, trust your gut. If something feels off about your a contractor you’ve engaged with, it’s better to just cut ties and go with someone else. There are so many possibilities out there. The contractor we used we found through an app called Thumbtack; they had stellar reviews and photos from past work were right on par with what we were trying to achieve. They were very adamant about working with the structure and style of our house, not against it, and it was a large reason why we ended up choosing them for the project.
Have your finishing materials ready in advance
It’s no secret that supply chain issues and inflation costs continue to be a nightmare, and it feels like that’s not going away any time soon. To curb some of this, we ordered as many finishing materials as possible early in the process (some even pre-demolition!), so we weren’t responsible for any holdups. If you can make your choices early on, and your contractor can give you a strong estimate on how much you’ll need, then place your orders! We tracked everything on a simple spreadsheet – from faucets to flooring to cabinet hardware – including where they were purchased from and the dates they were set to arrive. It helped us stay super organized, and kept our project manager happy, too!
One last thing about finishing materials…
Don’t get too attached. I had my heart set on some large hexagonal tiles for our backsplash… only to find out the manufacturer was discontinuing them, and the hardware stores in a 50 mile radius did not have enough in stock for the entirety of my project. I went with some different tiles I saw on an Instagram account I follow, and I’m glad I did. They offered a clean, but still interesting, look to the finished product.
You’re going to eat a lot of takeout
Honestly, we had good intentions setting up a small “kitchen space” in our living room. We had an Instant Pot and an induction burner at our disposal… yet, I think we cooked maybe six times throughout the several weeks we didn’t have oven access. It’s hard to cook food when your space is covered in drywall dust. Plus, working around the schedule of the contractors made the time spent making meals cumbersome. Just allot some budget to takeout. Had we known, we would’ve paid for Doordash’s Dash Pass or Uber Eats’ One to save on fees.
This is YOUR space, so plan your kitchen renovation around that
It’s easy to think about resale value, but if you plan on staying longterm, make choices that cater to you. You’re making this investment for yourself and the betterment of your day-to-day life. Don’t put something in your kitchen or leave something out if it’s not serving you to do that. Besides, something that makes your kitchen unique (like painted cabinets, for example) may attract a buyer if you ever sell.
We made these choices because they worked for us:
Glass rinser
Words cannot describe how much I love my glass rinser. Cleaning cups, water bottles, jars, and baby bottles is now a million times easier. It’s one of those things you don’t think about. We got ours off of Amazon.
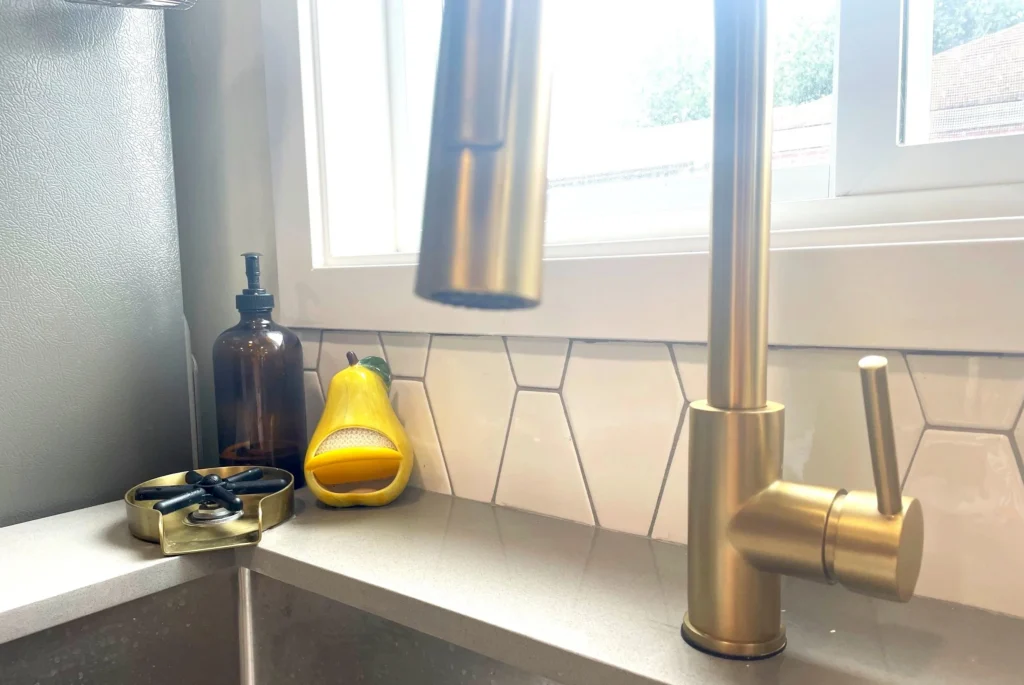
Gold accents
I love gold a lot. Some of my bathroom accents are gold, too. There was no way I wasn’t going with gold, so screw anyone that says gold isn’t timeless. It keeps the room really warm, and pairs perfectly with the whites, grays, and woods I have in the space.
Spice rack and sheet pan pull-out cabinets
We put both of these pull-outs right next to the stove. No regrets because they are some of the most useful cabinets in our entire kitchen. I like having all of my sheet/baking pans and cutting boards in an upright, convenient space to grab and go.
For the spice rack, we got uniform containers from Amazon and put the labels on the lids. Now it’s really easy to see all of our spices from above in neat little rows. Fiddling with a lazy susan in an upper cabinet no longer required!
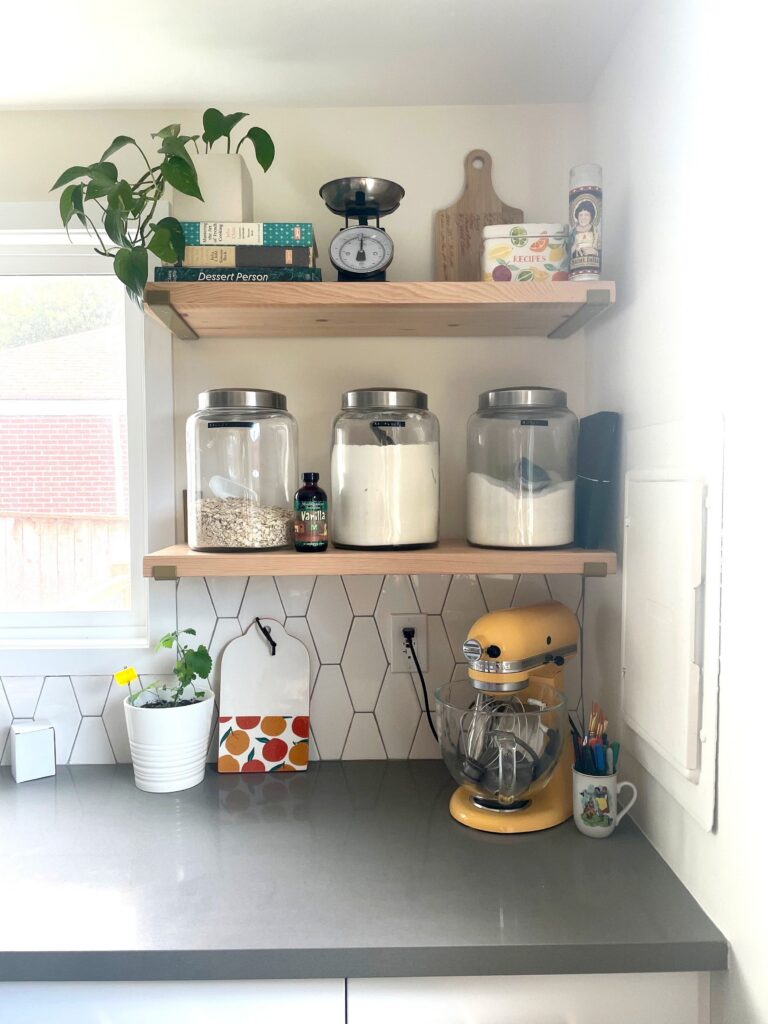
Some open shelving
We opted (with the help of our talented woodworking friend, Paul) to build, sand, and polyurethane our own wood shelves. Then, we put them in certain spots throughout our kitchen and utility room instead of cabinets. I really love the open shelving look, but given that we are in a state that has earthquake risk, we didn’t want to commit to full open shelving instead of top cabinets. Instead, I strategically picked spaces in both rooms to have a few shelves. My baking corner is one of them, and I am so in love. You’ll see it in the background of many of my Instagram posts and blog photos!
So there you have it! I hope this post has given you thought on how you’ll approach a kitchen renovation should you ever do one. While it was annoying to have two non-functional rooms, it was temporary, and the result was worth it. If you have any questions about my experience, feel free to leave a comment. If you’ve had a kitchen renovation in the past, I invite you to share your tips in the comments, too!